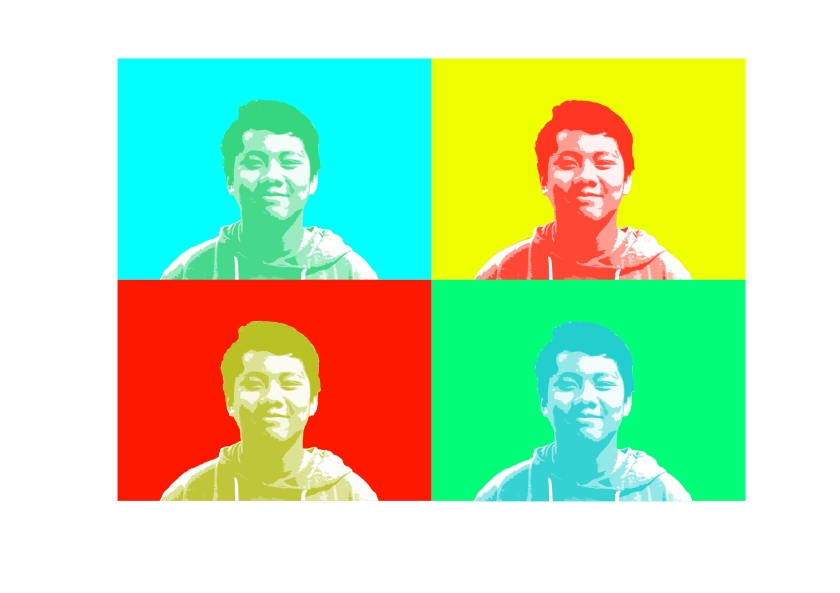
This week I’ve been working on an Andy Warhol project. The first time I saw how to do this project I thought it was fascinating. The artwork seemed familiar because I’ve seen the Andy Warhol art style before in movies and other places. Once I looked at the instructions I thought this project was going to be hard but surprisingly the project was fairly simple. First step I did was take a picture of myself and crop myself out from the background using the quick selection tool. Then I desaturated myself by holding down control, shift, and pressing the u key. Then I went to the filter gallery, went to the artistic filter gallery, and selected cutout. After that I created a new canvas and dragged my photo layer to the new canvas. I used the rectangle tool to create a background behind my photo and then I made 3 more copies of the background and myself. After that I put the photo I took and the background layer into a group.
I then used the ruler tool to divide the canvas into four squares. Then I put one group into a square and repeated the process for groups 2, 3, and 4. Then I double clicked the background layer in one group and changed it to a vibrant and bright color. I repeated that process for the other groups. Then I control clicked on the thumbnail of my photo, which then selected my photo only and not the background, and made another layer underneath the photo layer and named it “PC”. While still selecting my photo layer, I clicked on the PC layer and filled it to be a bright vibrant color that is opposite to my background. I then repeated that process for the other groups. P.S. this post was typed on 9-11-17 because I had no internet access to type it last week.